Last updated on January 7th, 2020 at 05:08 pm
As an Amazon Associate we earn from qualifying purchases.
At some point, you will be obliged to remove your garbage disposal for some reasons. There are 2 ways to do it: you either hire a professional plumber, which we don’t recommend it since it can be a little expensive, or you do it yourself and you save money and get yourself the chance to learn something new. In this article, we will be covering the exact same steps to learn how to remove a garbage disposal at minimal cost in 2 to 3 hours.
Table of Contents
How to remove a garbage disposal
To begin with, you need to turn off your garbage disposal by shutting off your electrical power switch or by removing the fuse that powers the unit.
Next, you have to unplug the disposal from the wall, if it is hardwired then you need to disconnect the wires.
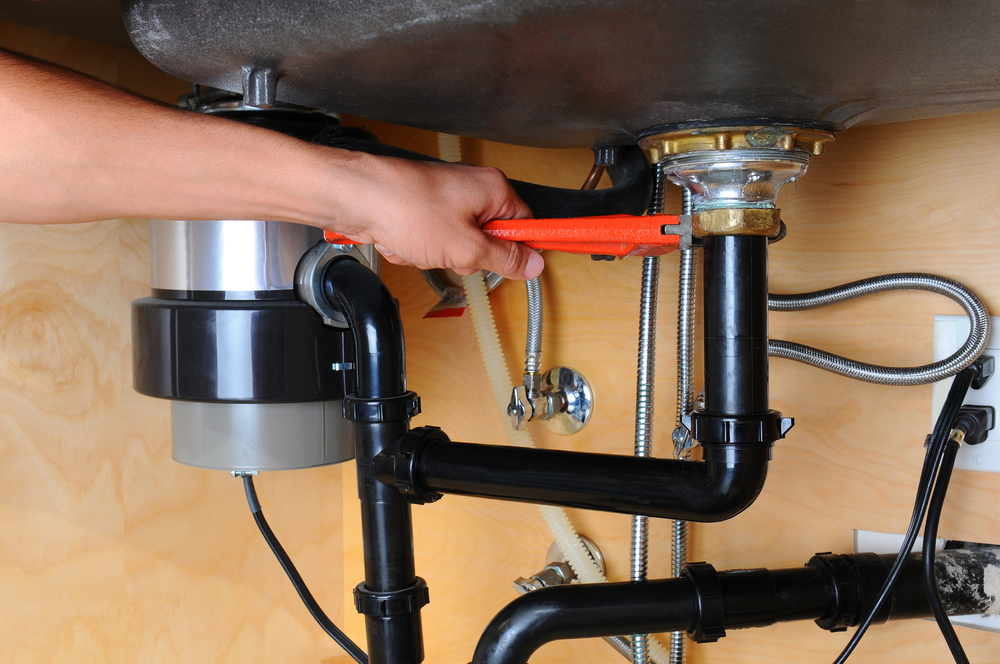
After, you have to remove the P-Trap or the drain trap, which is a pipe that connects the unit to the drain pipe. Place a bucket or a container right under your waste pipe so you can catch any water in the pipes.
Now you should remove the dishwasher, before you proceed to disconnect the garbage disposal, you will have to disconnect first the dishwasher drain line by using a pair of pliers.
Now is the time to remove the garbage disposal, to do so, grab a flat screwdriver and insert it into the lower mounting ring. However, if it is not turning, you may want to tap the flanges with a hammer. Once you feel it’s turning, it should come off easily but prepared to catch the disposal because it may be heavy.
Disconnecting the disposal mounting assembly from the sink
Your job is not done just yet, this is the last step of a garbage disposal removal. The mounting assembly is made up of 5 parts: the drain flange, the gasket rubber, the snap ring, the lower and upper mounting ring. The rubber prevent the drain from leaking, which can be prevented through the plumber’s putty as well.
Follow these steps to successfully detach the mounting assembly:
- Start by loosening the 3 screws which hold both of the rings (upper and lower), then remove the ring that is in a groove by using a bladed screwdriver.
- Now take out the seal and drain flange from the sink, also check if there is any old plumber’s putty to remove.
- That’s pretty much it.
Now that you removed your old garbage disposal, you already know that you have 2 choices: you either are willing to install a new one, if so, we published an in-depth article on how to install a garbage disposal, or you do not wish to continue using any garbage disposal in the future and want to replace it by new drain pipes. Follow along to learn how to install new drain pipes.
How to install new drain pipes
- First, use the pipe wrench to loosen and remove the nut which secures the drain flange so you can push the sink drain up for sink removal.
- Now clean the plumber’s putty around the hole using a sharp tool like a knife. If it’s not removing, then you may consider using alcohol.
- Form a circle using plumber’s putty to go around the circumference of the drain hole, clear any plumber’s putty left.
- The sink drain usually comes with a flat washer when it’s purchased in the first time. Under the sink, place the washer over the threads and start securing it with the large retaining nut which came along your new sink drain. Using
the the tongue-and-groove pliers, you should be able to tighten the nut as secure as possible. You may need someone to help you by holding the sink drain for you, and also, don’t forget to clear any plumber’s putty left. - Find the PVC drain tailpiece which will be connected later on to the elbow pipe. Remember that it should be long enough in order to be connected to the pipe. Now hand-tighten the PVC tailpiece to the drain to secure the piece.
- Connect the elbow pipe to the PVC drain tailpiece. We do not recommend you tighten them with a pipe wrench or
a tongue-and-groove pliers, it is preferred to be hand-tightened.
Amazon and the Amazon logo are trademarks of Amazon.com, Inc, or its affiliates.